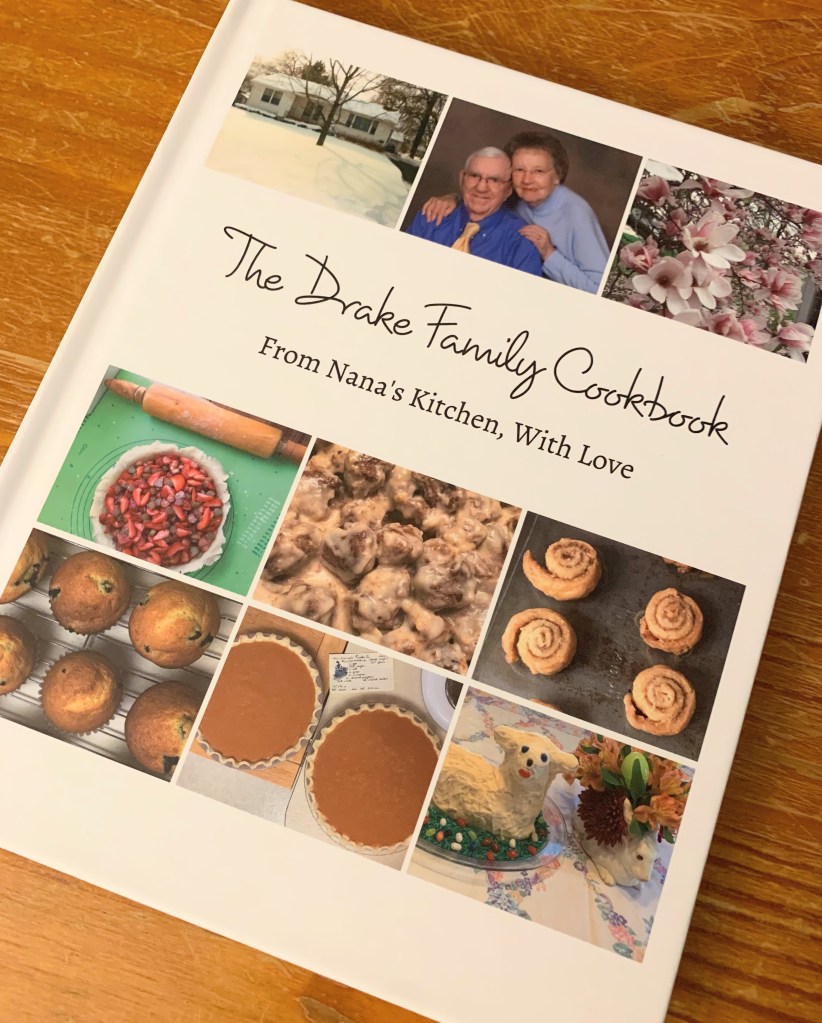
Over the past year, I’ve taken a break from blogging in order to write a cookbook for my family. In the book, I compile many of the recipes from my grandparents and write about our family’s culinary history. I’m so proud of the way the book turned out!
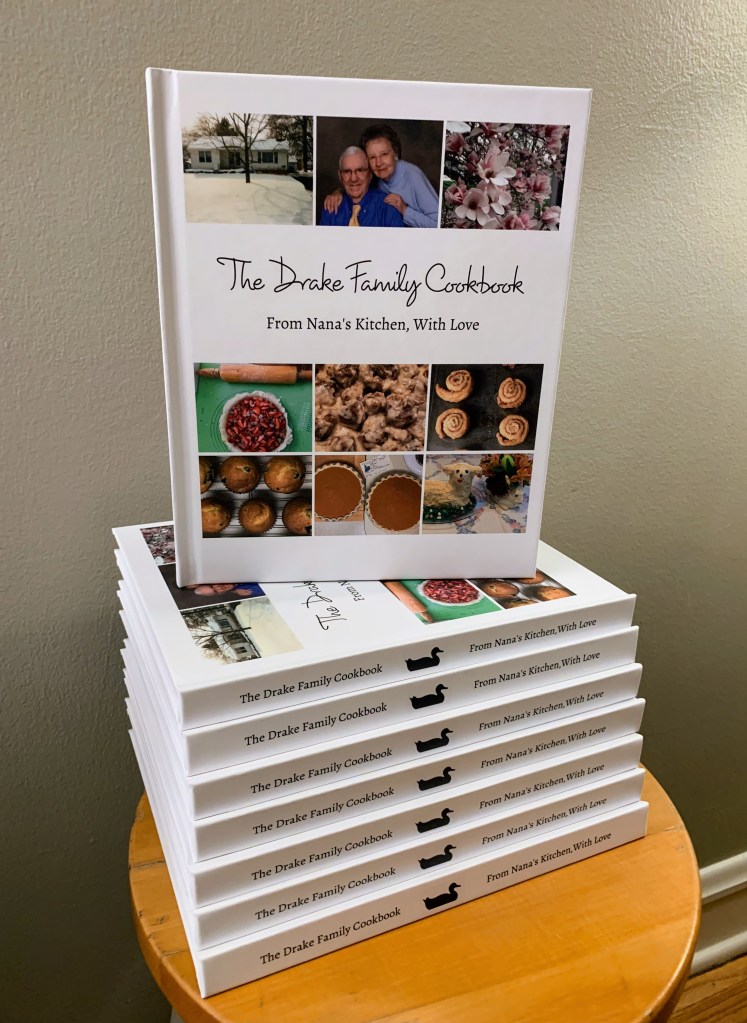
I wanted to write a cookbook for our family to preserve our cherished family recipes, and so everyone would have a copy of our favorite recipes. Whenever I was away at school, and wanted to make a family recipe, I’d have to call up my mom to give me the recipe. I had a few family recipes written in a blank spiral recipe book, but I enjoyed using original recipe cards that were written in my Nana’s or aunt’s handwriting. A cookbook with scanned recipe cards gave all of us access to those original recipes without having to further divide the original collections. It also gave me the opportunity to share special family stories and photos with the whole family. I’m so glad I took on this project, and I’m proud of this new family heirloom that I created!
This was a wonderfully rewarding project, and I encourage you to write a family cookbook of your own! Here’s some tips for writing your own family cookbook:
It will take a lot longer to write than you think! I recommend taking at least a year to compile and write the book. This allows you to take photos of dishes at particular holidays throughout the year as you make them, and time to allow family members to locate and contribute their recipes. I spent over two years to write the book, taking photos and collecting recipes over time, testing some of the recipes, and then taking about six months of concentrated writing and editing.
It doesn’t have to be perfect. I’m a bit of a perfectionist, so I spent a lot of time editing, writing, and formatting the book. At a certain point, I was sure that I would never finish the book. I had to remind myself that “done is better than perfect,” and my family would love the book even if the columns of the index weren’t perfectly aligned or if there was a spelling mistake. (I also proof-read the text carefully to avoid many spelling mistakes, but I will not fret if I find another one!)
Be consistent. I used a template for the layout of each page, and adjusted the layout as needed to accommodate larger recipe cards and photos. I consistently put the list of ingredients on the edge of the page, used page numbers, had consistent margins, used consistent abbreviations for teaspoons, cups, etc., and used the same font size for headings and text throughout the book. This helps give the book a professional and cohesive look.
Think about how you want to organize your cookbook before starting. It is very hard to rearrange the pages once you start laying them out! Many of our family dishes are eaten only at particular times of the year, so I arranged my cookbook by season, and each season had three themed sections. I made an outline of all the recipes that I wanted to include in each chapter and planned out each chapter before I started laying out the pages. This outline also helped me keep track of which recipes I had already scanned and had photos for, and which ones I needed to work on.
Ask your family for help with the recipes! This cookbook focused on our culinary heritage, and included many recipes from my grandmother and great-grandmother, but I also included some new family recipes that we enjoy today. My cousins recommended some recipes that they remembered growing up, that I was unaware of. They also helped me write out certain recipes that they make often that I hadn’t made before. I also included blank lined pages at the end of each chapter, so that everyone can write in their own favorite recipes that didn’t get included in the book.
Test out the recipes! If you haven’t made a dish in a while, take time to test it before you include it in the book. (Or, have your family members test out the recipe and send you photos and tips!) This will help you write out all the steps accurately, remind you of any tips or tricks to perfecting the recipe, and gives you an opportunity to take a photo of the dish.
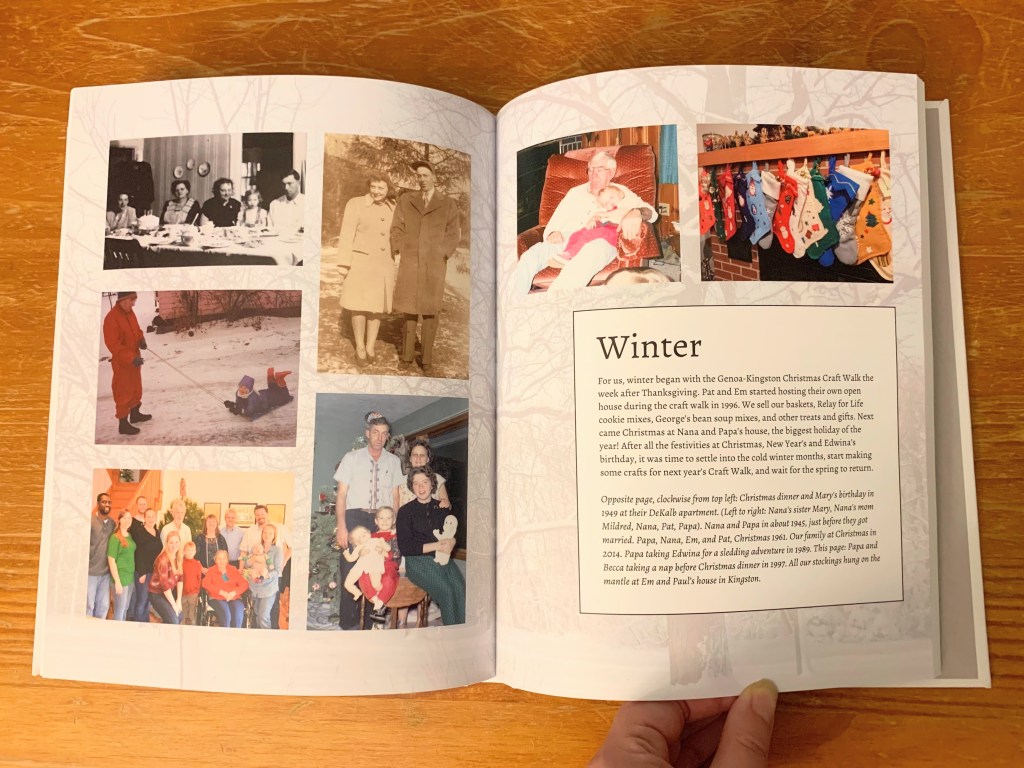
Include photos! I included as many photos as I could, including old and new family photos, photos of us cooking, and photos of the dishes. Photos of the dishes help to identify it and help the cook recreate how it’s supposed to look when they make it on their own. Whenever you make a dish, take a clear, well-composed photo of the dish. If I didn’t have a photo of the completed dish, and if there was room on the page, I tried to include a photo of the family member who originally made that recipe. On the introductory pages for each chapter (such as the Winter section below), I included a variety of old and new family photos, much like a family photo album. Younger family members loved flipping through the book to find photos of themselves and their parents when they were young!
Shop around for a book printer that will work for you, and watch for a deal! I looked at several printing services before deciding to use Blurb. I wanted to use premium paper, have as many pages as I wanted, and have editable templates. I used their free publishing software called BookWright, and I found that it worked pretty well for me. I also watched for a good sale on books, which came in June! (The coupon deadline also gave me a hard date to finish the book and was the push I needed to just complete it already!)
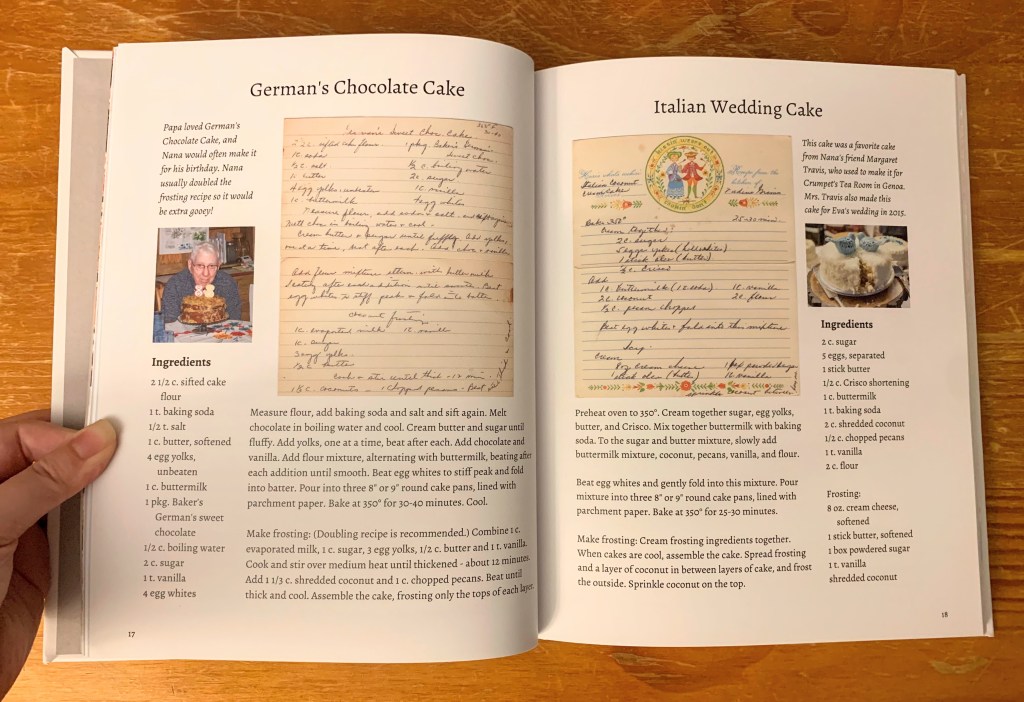
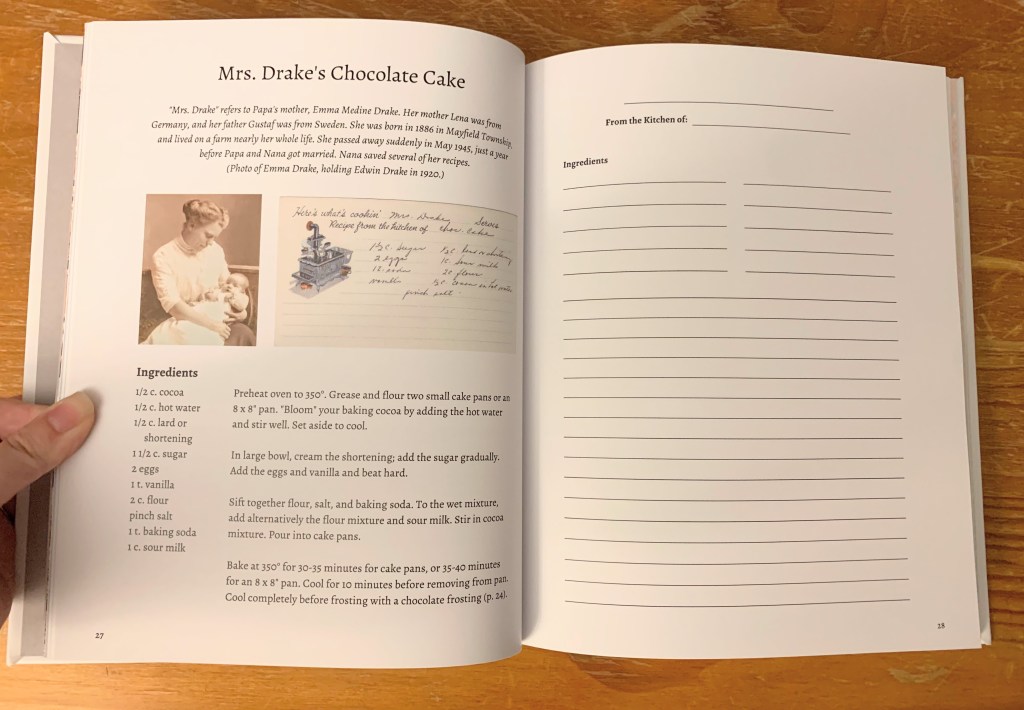
Include a scan of the original recipe card, as well as a typed version of the recipe. It’s so nice to read the original recipe in my grandmother’s handwriting, and I wanted to keep that authenticity of the original recipe. However, sometimes the recipes are hard to read, skip steps that the original cook knew well, or are just a basic list of ingredients, and younger generations might not be familiar with all the steps of the recipe. The typed version of the recipe allows me to add in all the necessary steps and other tips for successfully making that recipe. I scanned my recipe cards at 600 dpi to ensure a clear readable image.
Include a family tree in the front of the book. I made a family tree with photographs for the family to refer to. I wrote about “Nana” and “Papa” in the book, but to their great-grandchildren, they were “Great-Nana” and “Great-Papa.” The younger generations may not know Great-Nana’s full name and the names of her parents. On the family tree, I wrote their full names, as well as what I called them in the cookbook, so that it would be clear who everyone was, and how everyone was related.
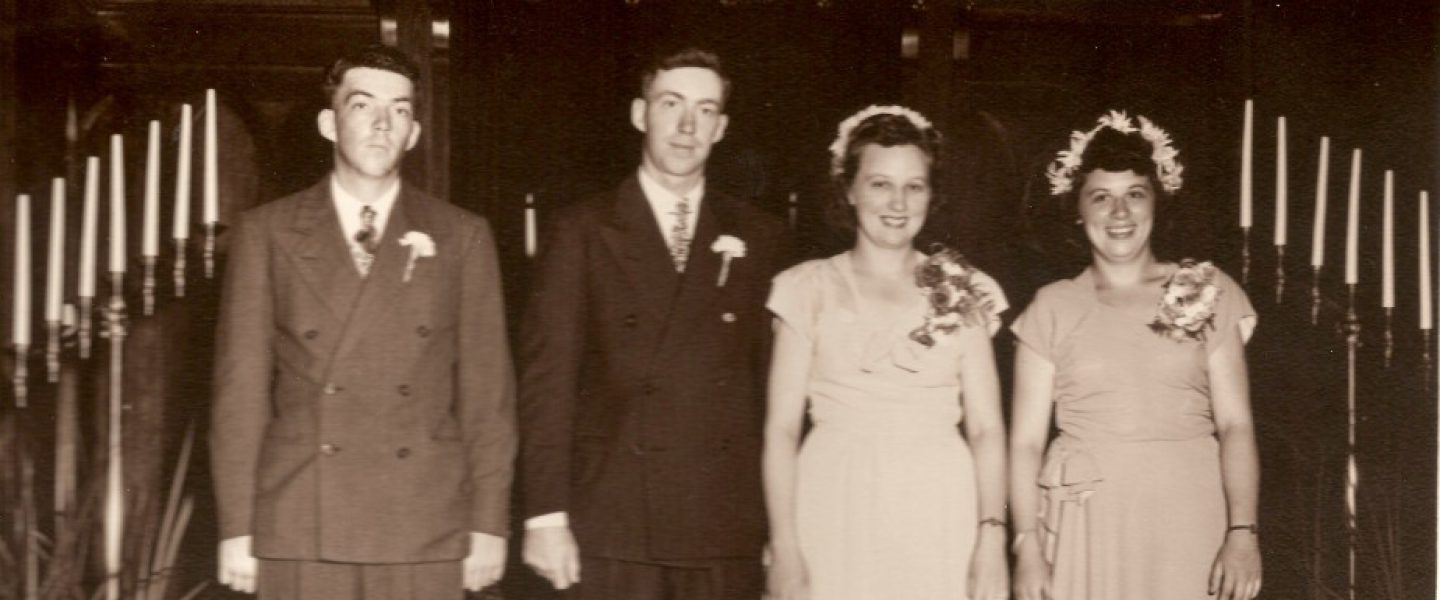
Write about family history and the origins of your family dishes. Other members of the family may not realize that a favorite family recipe came from your great-grandma or that it was a popular Swedish dish that came from Sweden with your ancestors. Or they may not know the story of why your mom makes a lot of jam every summer or why your family is obsessed with horseradish. Preserve those family stories, and help others in your family learn about family history! Although we don’t make this cake anymore, I included a recipe from my great-grandmother and some information about her life (below).
Consider adding blank pages. In each chapter, I included one page with lines on it (above), so that my family members had opportunities to write in their own favorite family recipes or attach their own photos into the book. They are encouraged to customize their own book by annotating the recipes and writing in their own recipes. My family loved this idea, and were excited to fill in those pages.
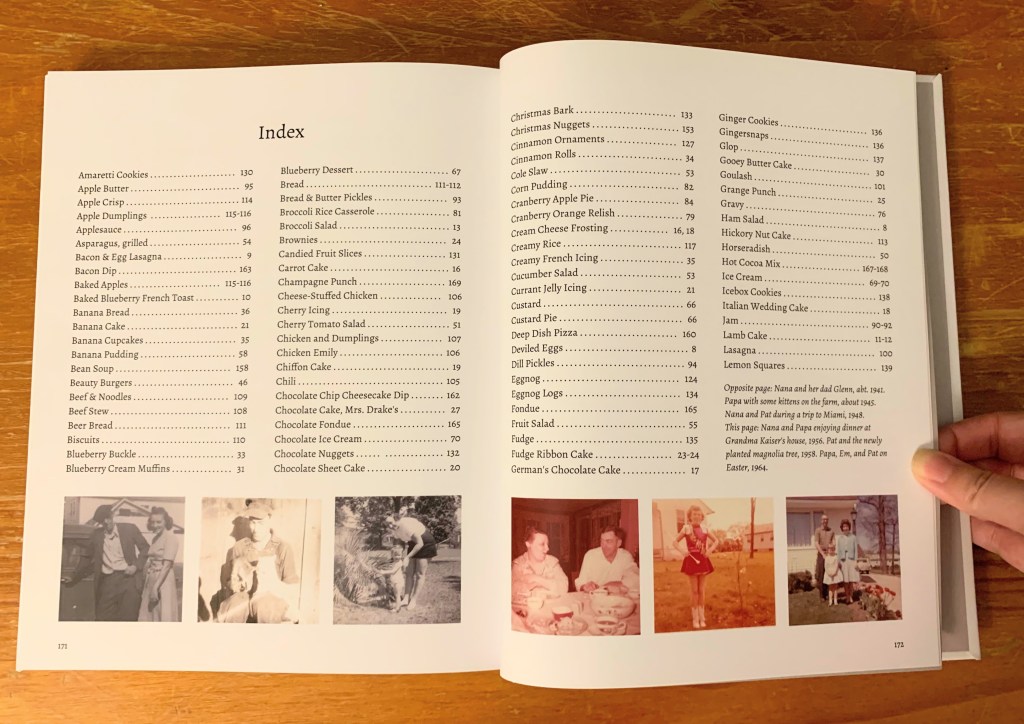
Include an index! Because I wrote the book, I’m very familiar with the sections and where particular recipes are in the cookbook. My family may not be as familiar with it, and may want to quickly find a particular dish. I had to manually write and format the index, but some programs may have features that automatically assemble the index for you. It may take a bit of time upfront to assemble it, but it will be an invaluable timesaver in the long run! I recommend putting together the index when you’re finalizing the book. Your family will thank you!
Not ready to write a whole cookbook but you want to share some recipes with your family? While I was writing this book, we made several projects to share recipes and make some items from favorite recipes. We started by getting together one weekend for a family scanning party. The recipe boxes and cookbooks from various family members are split between several households in our family. One weekend, we brought the recipe boxes and notebooks together to scan as many as we could. Some family members sorted through recipe cards to pull out the ones that they wanted scanned, and other family members ran several scanners to scan those and put them back in their spot in the boxes. I organized and renamed all these scans and put them into a shared Google Drive folder so that everyone could access them when they needed a recipe. This scanning session became the foundation for the cookbook. (Of course, there were dishes that were missing, and I tracked down and scanned those later.)
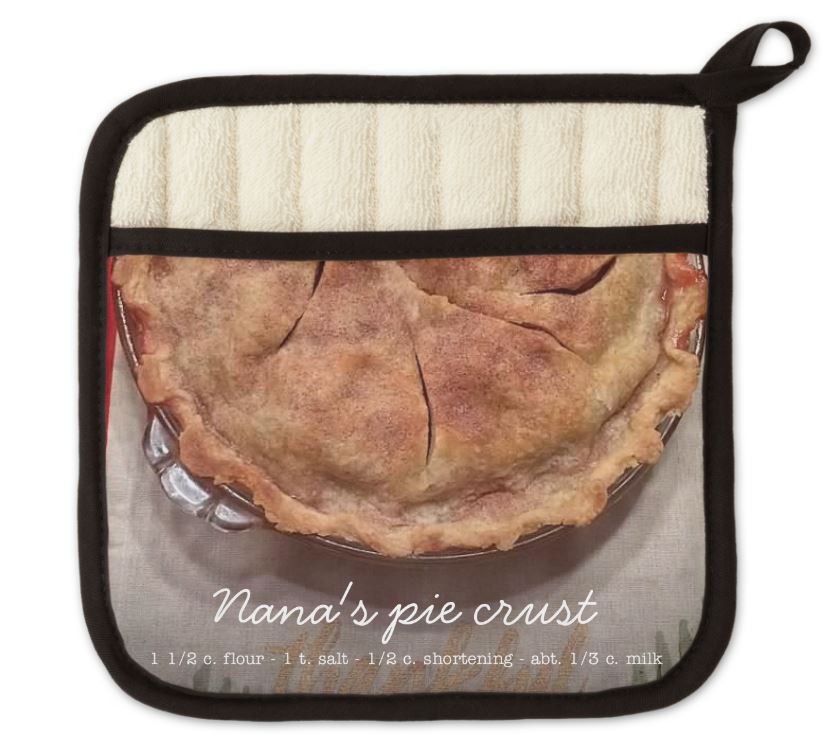
Before the book was done, I used some of those scanned recipe cards for other projects. For particularly favorite recipes, you can print the recipe card on potholders (such as the one on the left) or a tea towel to use in your kitchen. You can also burn a recipe card into a cutting board to display. Or, simply frame a copy of a favorite recipe or two with a photo of the original cook to hang in your kitchen. Use your imagination!
I hope this inspires you to start a family recipe project of your own! If you’re looking for more guidance, I highly recommend the books Preserving family recipes : how to save and celebrate your food traditions by Valerie Frey and From the Family Kitchen: Discover Your Food Heritage and Preserve Favorite Recipes by Gina Philibert-Ortega.

You have done a brilliant job! Thanks so much for sharing how you went about creating this beautiful looking book. It always helps seeing how someone else approached the task and its also very inspiring. I keep meaning to do something like this but can’t take the first step.
LikeLike
Thanks so much! ❤️ It was hard to take that first step, and I had to just take some baby steps before I finally got going on the project. For me, it became easier once I decided how I wanted to arrange the chapters of the book. Maybe start with the 5-10 most important recipes in your family, and build onto those foundational recipes. You can do it!
LikeLike